Showing posts with label recipe. Show all posts

1/5/17

Recipe: Chocolate Chip Cookie Dough Truffles

Ok, I admit it. I am weird. I do NOT like chocolate chip cookie dough. Never have. I love chocolate chip cookies, but the unbaked dough is gross. But, that being said, I'm in the minority in this household, so I had my 3 guys begging me to make these after they spotted the recipe on Pinterest. 

I think everyone knows the warnings about eating raw cookie dough, because of the uncooked eggs. Fortunately, these use sweetened condensed milk as a liquid replacement for the eggs, but they DO contain uncooked *flour* which has recently become a bit of an issue, too. So eat at your own risk, cookie dough lovers.

Cookie Dough Truffles
Recipe from CakesCottage

Ingredients:
½ cup (1 sticks) butter, room temperature
¾ cup packed brown sugar
1 teaspoon vanilla
2 cups all purpose flour
1 can (14 ounces) sweetened condensed milk
½ cup semi-sweet chocolate chips
½ cup finely chopped walnuts or pecans*
1 pound dark chocolate candy coating**
*My family doesn't like nuts in their chocolate chip cookies, so I just upped the amount of chips to 3/4 cup
** I use the pound-plus bars from Trader Joes or the Ghiradelli chocolate wafers available at my local grocery store. 

Instructions:
  1. In a bowl combine butter and sugar on medium-high speed until light and fluffy, about 2 minutes.
  2. Beat in the flour, sweetened condensed milk and vanilla until incorporated, beating well after each addition.
  3. Stir in chocolate chips and walnuts. (You can sub more chocolate chips for the nuts)
  4. Cover with plastic wrap and refrigerate for approx 1 hour, or until firm enough to handle.
  5. Shape mixture into 1 inch balls by rolling a spoonful in the palm of your hand (I use a melon baller to keep the size consistent.)
  6. Place on paper-lined baking sheets. Loosely cover and refrigerate for about 20 minutes or until firm again.
  7. In a bowl, melt dark chocolate candy coating either by placing atop barely simmering water as a double boiler or by microwaving according to package directions. I got tired of dipping truffles about halfway through, so you might consider doing this in batches, depending on how much time you have.
  8. Dip the cookie dough balls into the chocolate and place on parchment paper. I use a fork to dip and gently shake the excess off before placing on the parchment.
  9. Let the truffles sit until hard, about 15 minutes.
  10. Once set, remelt remaining candy coating.
  11. Carefully drizzle chocolate over truffles either by using a ziplock baggie with a tip snipped off or by dipping a fork and gently shaking it about 2 inches above the truffles. As you can see by the fancy picture, I didn't bother with that part this time. They still tasted fine according to the boys.
  12. Store in the refrigerator and serve cold. These can also be frozen for longer storage.

1/3/16

German Chocolate Macaroons

This was a Facebook find, via Pinterest, that my husband insisted I make for Christmas. He's a hard core macaroon fan (not to be confused with macaron). These are sweet, chewy, nutty, and pretty much the perfect coconut macaroon. They aren't difficult to make, but they are very time-consuming. So time consuming that I was way too tired to haul out the real camera and take fussy photos. This is my iPhone. Sorry. :)

The source recipe is from Chef in Training.

Ingredients
5⅓ cups shredded sweetened coconut (two of the smaller size bags)
¾ cup sugar
6 Tablespoons flour
½ teaspoon salt
5 egg whites
1 cup finely chopped pecans (Calls for toasted, but they were fine untoasted)
Chocolate topping
Melt 4 ounces sweet chocolate (The Baker's kind)
1 tablespoon shortening
Sweetened condensed milk topping
6 ounces sweetened condensed milk (I just did the whole 14 oz can because I had no use for a partial can.)

12/2/14

Recipe: Chocolate Peanut Butter Rice Krispie Bars

I'm a very bad blogger. It has been 2 months since my last post. Never fear, I'm perfectly fine. Obligations with family and our PTO swamped me this fall. Which means not only did I not blog, I didn't read. Which is a travesty I'm correcting.

What I did manage to do was find my new favorite treat to bring to events on the spur of the moment. I know this isn't new to many of you, but for me, these were a revelation.

I've made homemade Rice Krispie Bars for forever. It's not difficult, after all. And the store bought ones suck. Ew. I even knew about various additions or flavors, although I was too lazy or uninterested to try them. Then one day, my husband calls me. He drives across the country for a living, and I figured he'd found a new favorite regional food. He had. It was these. He sent me two links to two recipes, figuring one of them had to work. They sounded ok—peanut butter and chocolate nearly always work for me—but kind of mundane.

Oh. My. God. It's always the simplest things that blow you away with their glory, but these are truly the best things I've had in forever. They are chewy, crunchy, salty, sweet...They hit every one of the perfect snack requirements...and they take 10 minutes or less and produce a 13 x 9 pan of the little darlings.

In the last 2 months, I've made 4 pans of them. I've taken them to my aforementioned PTO meetings where they were devoured. I made them for Oldest to sell at a Family Movie Night event for Student Council.  They sold out before the movie even started. I dropped some off for a friend having a not-so-good day, and she thanked me for saving the crappiest day ever because THEY ARE THAT GOOD.

The only modifications I made to the recipe were peanut butter amounts and subbing in butter for margarine. Butter is always better.

10/7/14

Recipe: Orange Cardamom Loaves

Guess what time it is?! It's Fall Baking Time. Yes, those vanity capitals are on purpose. I love it when the chill in the air "forces" me to start baking. It's too warm for a fire in the wood stove, but too cold to not want it warmed up just a little bit.

Plus the plethora of fall baking ingredients: fresh pears, pumpkin and all of the other "fall" stand-bys. I picked up a baking magazine the other day, an overpriced one that cost about the same as a trade paperback book *winces*, because I wanted to make just about every recipe in it.

The first recipe I attempted was Orange Cardamom Bread for a bake sale fundraiser. The recipe makes 2 loaves: one for me, one for the sale ;) While I liked it a lot, I could not taste the cardamom. So I fiddled with the levels a bit and found a balance between spicy and orange-y. The real sneaky part about this bread is that because cardamom enhances the orange flavor, you really aren't going to get much straight flavor except as an end note. 

7/8/14

Recipe: Striped Tea Sandwiches

I finally caved and signed up with the DVD Netflix service. We lost our local DVD store last year (the owner retired--amazingly, the business was financially healthy), and while most people have gone to streaming, our internet is just not up to snuff enough to reliably do that. So onto Netflix I went, determined to find some older movies that our crappy Redbox just doesn't offer.  We made it a film noir night with Out of the Past. Since my viewing buddies are my mom and her 70-something BFF, I made tiny tea sandwiches to go with. These are adapted from The Book of Afternoon Tea.

Striped Tea Sandwiches
3 oz sliced cooked ham
4 teaspoons mayonnaise
1/2 teaspoon Dijon-style mustard
1/4 cup cream cheese, softened
4 teaspoons chopped fresh chives
salt and pepper
1/2 cup (or more) butter, softened*

4 slices white bread
4 slices soft wheat bread

Finely chop ham. In medium bowl, mix ham, mayo and mustard well

In another bowl, mix cream cheese, chives, salt and pepper. Butter 2 slices each (4 total) white and whole wheat bread on one side only and remaining 2 slices each (4 total) white and whole wheat on both sides. *The butter provides a barrier and prevents the sandwiches from becoming soggy. It also helps "glue" everything together.

Spread half of the ham mixture on buttered sides of 2 whole wheat bread slices. (You are making two giant sandwiches). Cover with white bread that has been buttered on both sides. Spread cream cheese over white bread. Cover with brown bread which has been buttered on both sides. Spread with remaining ham mixture and top with white bread, buttered side down.

Cover sandwiches and refrigerate at least 15 minutes.

Remove crusts from bread. Cut each sandwich into 6 pieces. Makes 12.


6/23/14

Recipes: Gourmet Popcorn Party

For an entire week this month (the last week of school), I became obsessed with gourmet popcorn recipes. I bought myself an air popper like this one, and then I scoured the internet looking for recipes. The results were taken to my sons' elementary school and left in the teachers' break room. Partly because the teachers were getting summer-itis too, and partly so I wouldn't eat all of that popcorn. I'm definitely going to do this again and probably tie it in with Staff Appreciation Week.

To no one's surprise, the sweet popcorn recipes were by far the favorite, but there were some other good ones, too! None of these take more than 40 minutes to throw together (including curing time for the caramel corn), although there's some that require time to set up and/or cool. The cinnamon one was my favorite.

The Savory:


Italian Breadstick Popcorn

Chili Lime Popcorn


The Sweet:


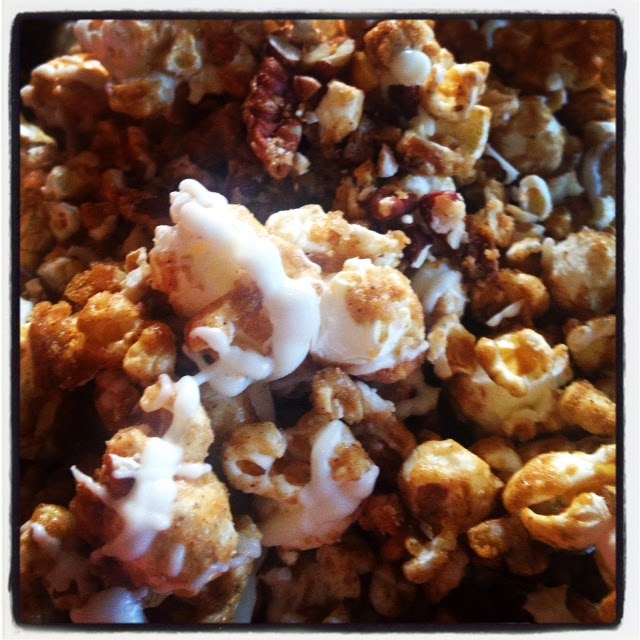
Salted Chocolate Caramel Popcorn


Cinnamon Bun Popcorn


S'mores Popcorn 


1/28/14

Recipe: Pineapple Pound Cake with Cream Cheese Frosting

Pineapple Pound Cake with Cream Cheese Frosting

This is an awesome, dense, bakery-style cake. It's super rich, too. And the secret to that is that you apparently must use nearly a whole carton of eggs. I wish the rum flavor was more pronounced, but this was a hit here. Because it is so heavy, you will get quite a few servings out this!

12/19/13

Recipe: Butter's Famous Marshmallows

Finished marshmallows
I recently purchased a baking cookbook called Butter Baked Goods. It's written by the owner of a small bakery, but what intrigued me most were the marshmallow recipes. The recipes I've seen before were all a little intimidating, but this was super easy to do, and they turned out great. It's one of the few that does not have you sitting over a candy thermometer waiting for a specific temperature. And I've made two batches without a hitch. (Please excuse the horrid photo. The lighting in my kitchen is the worst).

Butter's Famous Marshmallows
1 cup water
3 envelopes unflavored gelatin
2 cups granulated sugar
1/2 cup light corn syrup
1/2 teaspoon salt
2 tablespoons vanilla
Lots of powdered/confectioner's sugar (about 2 cups)

1. In a stand mixer with the whisk attachment, pour 1/2 cup of water into the bowl. Sprinkle in the gelatin. Set aside to let the gelatin soak.

2. In a saucepan over high heat, add sugar, corn syrup, salt, and remaining 1/2 cup of water. Bring to a rolling boil and continue to boil for 1 minute. Remove from heat.

3. Turn mixer to low and mix gelatin a few times. Slowly add the hot sugar mixture, pouring it gently down the side of the bowl, and continue to mix on low. (Make sure everything is mixed before cranking the speed up or you will end up splattered with scalding sugar!!)

4. Turn the mixer to high and continue to whip for 10-12 minutes until the batter just about triples in size and becomes very thick. It will look like glossy marshmallow cream, but thicker. Stop the mixer, add the vanilla, and whip briefly to combine.

5. Transfer mixture to a buttered 9 x 9 pan and use a spatula to scrape the bowl and smooth.

6. Cover with a greased sheet of plastic wrap.

7. Leave the marshmallow to set at room temperature for at least 3 hours or overnight. The marshmallow will be too soft and sticky to cut otherwise! I let batch one set overnight and batch two for five hours. Overnight is better.

8. Sprinkle a work surface with powdered sugar (I used a rimmed baking sheet to corral the mess). Run a knife along the edge to loosen the slab.

9. Use a large knife to cut the slab into 1 inch squares. Coat the freshly cut marshmallows in sugar until completely covered.

12/3/13

Recipes: Quick Holiday Goodies

If you need a quick hostess gift or addition to your holiday cookie tray, here are three super easy recipes that have always produced great results for me.


Candy Cane Hearts
Mini candy canes
white candy coating (sometimes called Almond Bark)

For each heart, you will need 2 mini candy canes. I crush the inevitable broken ones in a plastic bag using a rolling pin to sprinkle later. Melt candy coating according to package directions. If it's too thick to pour, try adding a tiny bit of vegetable oil until you get the right consistency.

Line a work surface with waxed paper. Arrange two candy canes into a heart shape. Fill with melted candy coating. Immediately sprinkle with crushed candy canes. Cool, then carefully peel from the paper.

7/16/13

Texas Brownies aka Texas Sheet Cake (Recipe)

This is more traditionally known as Texas Sheet Cake, but the recipe I've always used calls them brownies. It's from a 1988 recipe card from Great American Recipes, one of those companies that used to send you free cards to entice you to subscribe to monthly recipe deliveries. (Which, of course, I never did).

What makes this weird is that most of the prep is done on the stove. There's no creaming of butter for either the cake or the frosting. It has a unique flavor and texture as a result. This is not a gourmet, chocolate aficionado's type of cake. It's a family potluck type of dessert. It's a cake-like brownie (or a brownie-like cake). Very sweet, slightly chocolate-y, and makes a huge pan!  I don't own a 17x11 pan. Mine was 15 x 11 and worked fine. Just adjust the baking time to your pan and test the center with a toothpick. I got 36 brownies from my smaller pan.

Make sure you pour the frosting on while the cake is warm and resist cutting into it while it's still warm. It cuts much more cleanly after it cools.

7/10/13

Rice Pudding with Cardamom and Pistachios (Recipe)

Our favorite Indian restaurant used to serve a delicious rice pudding at their lunch buffet, but no longer does. Craving it something fiercely in the epic heat wave we experienced last week, I went on a quest through recipe after recipe online before discovering this very easy preparation at Honeyandjam.com !

No weird ingredients, no fussy preparation. The worst part is waiting for this to chill, although in all honesty...it was delicious warm, too. Next time, I might try stirring in some lemon zest right before serving.

 Rice Pudding with Cardamom and Pistachios
1/2 tablespoon butter
1/2 teaspoon ground cardamom
1/8 teaspoon ground cinnamon
1/8 teaspoon ground nutmeg
1/4 cup plus 1 tablespoon sugar
1/2 cup basmati rice, rinsed and drained
2 cups milk
1 cup cream
1/4 cup pistachios, shelled and chopped, plus extra for garnish, if desired

1. In a medium saucepan, melt the butter over low heat. Stir in the cardamom, cinnamon, nutmeg and sugar and cook for 1 minute, stirring constantly.
2. Stir in the rice, milk and cream. Bring the mixture to a simmer over high heat, then reduce the heat to maintain a simmer. Cook the rice, uncovered, until very tender, stirring occasionally, 20 to 25 minutes.
3. Remove from the heat and set the pan aside, uncovered, until the rice cools to room temperature, about 30 minutes to 1 hour. (The pudding will be very soupy at first, but will thicken as the rice continues to absorb the liquid as it cools in the pan.)
4. Stir in the pistachios, then cover and refrigerate the pudding until well chilled. Garnish with extra pistachios if desired. This makes about 3 cups rice pudding.


6/24/13

Recipe: Pineapple Upside Down Cupcakes

My husband loves Pineapple Upside Down Cake. It's his favorite cake in the world. I don't make it very often, though. This year, he told me he didn't need a cake for his birthday, and made me promise not to make him one. I, being the stubborn person that I am, nodded in agreement, while deciding that cupcakes were not "a cake" and therefore I was still honoring my promise.

My Google search for a cupcake-sized Pineapple Upside Down Cake resulted in quite a few recipes, surprisingly. The best one I found was from Allrecipes.com 
I made a few minor adjustments*, but was very pleased that they not only turned out well the very first time, but they kept well (refrigerated) through the next day.

Pineapple Upside Down Cupcakes
 
cooking spray
1/2 cup butter, melted
1 1/2 cups brown sugar
24 maraschino cherries
1 to 2 cans pineapple rings
1 (18.25 ounce) package yellow cake mix (if you can find pineapple mix, that will work, too)
3 eggs
1 1/3 cups pineapple juice
1/3 cup vegetable oil


Move an oven rack into the middle of the oven. Preheat oven to 350 degrees. Spray 24 muffin cups with cooking spray. Line a work surface with waxed paper. Spoon 1 teaspoon melted butter into the bottom of each sprayed muffin cup. Spoon 1 tablespoon brown sugar in each muffin cup. Press a maraschino cherry into the center of the brown sugar in each muffin cup. Trim pineapple rings to fit around cherry. It's okay if it covers the cherry slightly.

Mix  cake mix, eggs, pineapple juice, and vegetable oil in a large bowl with electric mixer on low speed until moistened, about 30 seconds. Turn mixer speed to medium and mix for 2 minutes. Pour pineapple cake batter into the muffin cups, filling them to the top; do not overfill.

Bake in the preheated oven until a toothpick inserted into the center of a cupcake comes out clean, about 20 minutes. Allow cupcakes to cool at least 5 minutes before inverting muffin cups onto the waxed paper to release. Serve with pineapple and cherry sides up.

*Adjustments: The original recipe called for a pineapple cake mix, which neither of my grocery stores carried. The pineapple juice adds plenty of flavor, though, so I think the yellow cake mix worked fine. You can, of course, make the batter from scratch if you prefer. The recipe also called for crushed pineapple, pressed into the top, but I prefer the chew of the rings. And finally, I've omitted the dusting of powdered sugar called for because these are quite sweet all on their own. If the rings or cherries stick, it's easy to pop them out with a plastic fork/knife and rearrange while the cakes are warm. They'll stay put once they've cooled.

4/9/13

Recipe: Fresh Apple Walnut Cake

Here is a recipe that's older than I am. It's one of the three cakes my mom has made pretty regularly over the last 30+ years. (The other two are her Black Joe cake and a scrumptious carrot cake.) If you don't look at the ingredients too closely, you might be able to fool yourself into believing this cake is good for you.

It has apples. It has walnuts. And best of all, You Don't Have to Grease and Flour the Pan!!!

*Snoopy Dance*

The ungreased angel food cake pan (You should have the kind with the removable center!) allows the batter to climb.  Yes, that's a lot of vegetable oil. But this is a big cake. And, while I haven't tried it, you could probably sub in a bit of applesauce for some of it. I also use this gizmo to peel, slice and core the apples. I hate to peel anything, but this gadget cuts down the prep time tremendously!

Fresh Apple Walnut Cake

Ingredients


1 1/2 cup vegetable oil (you could probably sub in some applesauce)
2 cups sugar
3 eggs
2 teaspoons vanilla
1/2 teaspoon salt
1 teaspoon baking soda
1 teaspoon cinnamon
1/4 teaspoon nutmeg
3 cups flour
3 cups fresh apples, chopped (I use Granny Smiths)
1 cup nuts, chopped

Combine oil, sugar and eggs; beat well. Add vanilla, salt, cinnamon, nutmeg, and soda; stir on low. Gradually add flour. Stir in nuts and apples.

Pour batter into an UNGREASED angel food cake/tube pan (preferably one with a removable bottom). Bake at 350 for 50-60 minutes or until butter knife inserted in the center comes out clean.

Cool completely on wire rack. Gently remove from pan. Store covered.

This is a moist,  yummy cake that is perfect with coffee. I admit it. I've eaten a slice for breakfast before. It's actually better if you let it cool completely, wrap it up tightly in plastic wrap or foil, and let it sit overnight. But if you can't wait that long, it's good hot out of the oven, too.


3/11/13

Recipe: Mini Pumpkin Walnut Cupcakes with Spiced Cream Cheese Frosting

I was given a huge bag of walnuts recently. HUGE. And with my baking funk for the last few months, they're still hanging around the kitchen. My husband—selfless person that he is—suggested that pumpkin walnut cupcakes or cookies would be a great use for them. And if he had to help eat them, well...sacrifices must be made.

I found these cupcakes at a cute blog called The Comfort of Cooking. The original recipe had a yield of 24 cupcakes, which I can only assume was for full-sized ones, despite the post being about minis. I ended up with nearly 60 mini cupcakes! Good thing these are destined for a school PTO meeting.  The frosting is a little on the tart, soft side. Make sure to store these refrigerated, if frosted!

Cupcakes
Makes 50-60 mini cupcakes
2 1/4 cups all-purpose flour
1 tablespoon baking powder
1/2 teaspoon baking soda
1/2 teaspoon salt
3/4 teaspoon ground cinnamon
1/2 teaspoon ground ginger
1/2 teaspoon ground nutmeg
1/2 cup butter, softened
1 1/3 cups sugar
2 eggs, beaten until frothy
1 cup pumpkin puree
3/4 cup milk
3/4 cup chopped walnuts
 

12/18/12

Recipe: Tri-Cornered Cream Cheese Cookies with Jam Filling

I'm sure it comes as no surprise that I have approximately a billion cookie cookbooks. This recipe is a variation found in the September 1994 Cookies Galore Pillsbury magazine. These are far more fussy than most of my usual cookies, since I'm more of a  drop cookie/bar cookie fan. But for Christmas, I make these for my husband who adores them. The dough can also be used for a sugar cookie dough that you can cut with cookie cutters. Baking times should be adjusted based on the size of the cookies.

Cream Cheese Cutout Cookies
1 cup sugar
1 cup butter, softened
1 (3oz) package cream cheese, softened
1 teaspoon vanilla
1 egg
2 1/2 cups flour
1/4 teaspoon salt
jam in various flavors: I use blackberry, seedless raspberry, and apricot
powdered sugar

In a large bowl, beat sugar, butter, and cream cheese until light and fluffy. Add vanilla and egg; blend well. Lightly spoon flour into measuring cup; level off. Stir in flour and salt; mix well. Cover with plastic wrap; refrigerate 1 to 2 hours for easier handling. I refrigerate mine overnight. I also put any scraps BACK in the fridge before re-rolling, because this dough gets soft really quickly.

Heat oven to 375F. On lightly floured surface, roll half of dough at a time to 1/8" thickness; refrigerate remaining dough. Cut into 2 1/2" circles with cookie cutter. Place 1 inch apart on ungreased sheets. Spoon 1 teaspoon jam onto center of each round. Shape into triangles, folding 3 sides in without covering jam; pinch corners to seal.


Bake at 375 for 7-10 minutes or until edges are lightly browned. Cool 1 minute; remove from cookie sheets. Dust with powdered sugar, if desired.


To make cutouts, follow the recipe above, omitting the jam and powdered sugar.  Cut with floured cutters. Bake similar sized cookies together, carefully watching the time. They tend to over bake quickly.  If your cookies have detailed designs, you might consider chilling the cutouts before baking.

11/14/12

Recipe: Cranberry-Orange Sauce

This is an oldie, but goodie. I really love the way the orange mellows the cranberry flavor. My family won't use any other recipe but this one. And forget about that canned stuff. This is super easy to make and tastes great on leftover T-day sandwiches, too. This one is from Pillsbury, although you can find variations just about everywhere. (Pardon last year's photo. I hope to have a more appealing one after this year's holiday!)


1 bag (12 oz) fresh cranberries
1 1/3 cup sugar
1/4 cup water
1 tablespoon orange zest
2 tablespoons lemon juice
1/4 cup orange juice or orange flavored liqueur

In nonreactive 4-qt saucepan, mix cranberries, sugar, orange peel, water and lemon juice. Cook over medium-low heat, stirring frequently, until juices start to flow and sugar is dissolved.

Increase heat to medium; simmer 6 to 8 minutes longer, stirring occasionally, until cranberries pop. Stir in liqueur. Refrigerate about 1 hour or until completely cooled.


9/10/12

Recipe: Chewy Chocolate Chip Cookies

I discovered this recipe via the lovely food blog, Full Fork Ahead. They have adapted it from a Kitchen Aid recipe. My only change is to use a combination of milk chocolate chips and Nestlé semi sweet chunks. These cookies are soft, chewy, don't spread everywhere, and you can't bite into one without getting some chocolate! Imagine kick-ass Keebler Soft Batch without that chemical preservative taste. Mmmm...

You really need a sturdy stand mixer to make these. If you don't have one, you'll have to do these as you normally would,  adding the last of the flour by hand.

1 cup granulated sugar
1 cup brown sugar
1 cup (2 sticks) butter or margarine, softened
2 eggs
2 teaspoons vanilla
1 1/2 teaspoon baking soda
1 1/2 teaspoon salt (I use 1 teaspoon to cut down on saltiness)
4 cups all-purpose flour
6 ounces semi-sweet chocolate chunks (about 1 cup)
6 ounces milk chocolate chips (about 1 cup)


Preheat oven to 350 degrees.

Place sugars, butter, eggs and vanilla in mixer bowl. Attach flat beater to mixer. Turn to Speed 2 (just above "stir") and mix about 30 seconds. Stop and scrape bowl with spatula. Turn to speed four (about medium) and beat about 30 seconds more. Stop and scrape bowl with spatula.

Turn to Stir (low) Speed. Gradually add in baking soda, salt and flour to sugar mixture and mix about 2 minutes. Turn to Speed 2 and mix about 30 seconds more. Stop mixer, scrape bowl again. Add in chocolate chips and mix on Stir Speed for 15 seconds.

Drop by rounded spoonfuls onto parchment-lined baking sheets, or roll into balls and place on parchment-lined baking sheets, about 2 inches apart. Bake for 10 to 12 minutes, until the edges of the cookie have just started to turn golden brown. Leave on baking sheet for about a minute after removing from oven, then put them on wire cooling racks.

Keep an eagle eye on the cookies because they'll lose their chewy, soft texture if you overbake them.

8/15/12

Recipe: Lemon Yogurt Cake

This is my favorite pick-me-up recipe that doesn't involve chocolate. It has a bright, strong lemon flavor, a spongy, firm texture, and slices beautifully.  This cake received a Best of Division at the county fair least week (I'm totally bragging).  It is that good.

Recipe by Ina Garten. My commentary and adjustments are in italics. Photo is my own.

Lemon Yogurt Cake by Ina Garten

1 1/2 cups all-purpose flour
2 teaspoons baking powder
1/2 teaspoon kosher salt
1 cup plain whole-milk yogurt
1 1/3 cups sugar, divided
3 extra-large eggs
2 teaspoons grated lemon zest (2 lemons) (Microplanes are a godsend!)
1/2 teaspoon pure vanilla extract
1/2 cup vegetable oil
1/3 cup freshly squeezed lemon juice

6/13/12

Recipe: Cream Cheese Pound Cake

I've only made one previous pound cake, the Blackberry Swirl Poundcake from Martha Stewart. This one is a more traditional one, and I must say makes THE BEST strawberry shortcake ever. But...the ingredients are fat, fat, and more fat, so save this one for when you want to distribute most of it to the neighbors, family, friends...anything to get most of this cake out of the house because it is addicting and way too easy to make.

1 1/2 cups butter, softened
1 (8 oz) pkg cream cheese, softened
3 cups sugar
6 eggs
3 cups flour
dash of salt
1 tablespoon vanilla

Heat over to 300 degrees F. Grease and flour bottom, side and tube of a 10 x 4 inch angel food cake pan or a 12 cup fluted tube cake pan (Bundt®--this is what I used.)

In large bowl, beat butter and cream cheese with electrix mixer on medium speed until creamy; gradually add sugar, beating well. Add eggs, one at a time, beating until blended.

Mix flour and salt; gradually add to butter mixture, beating on low speed just until blended after each addition. Stir in vanilla. Pour batter into pan.

Bake 1 hr 40 minutes or until toothpick inserted in center comes out clean. Cool in pan on cooling rack 10-15 minutes. Remove from pan to wire rack*; cook completely, about 1 hr.

*This is a crucial step that I messed up on. I set mine out to cool on a regular pan and the bottom got a little soggy. There is a lot of residual moisture in the cake, so a wire rack is important!

5/27/12

Recipe: Rum-Coconut Key Lime Pie

I've never made key lime pie before. I rarely make pies at all. Partly because they're difficult to share with the neighbors, and partly because I hate making pie crust. But I saw this recipe in a recent Pillsbury Casseroles and Potluck cookbook, and it sounded divine. Also? It doesn't use a traditional pie crust, but an incredibly yummy mix of coconut and crushed cookies.